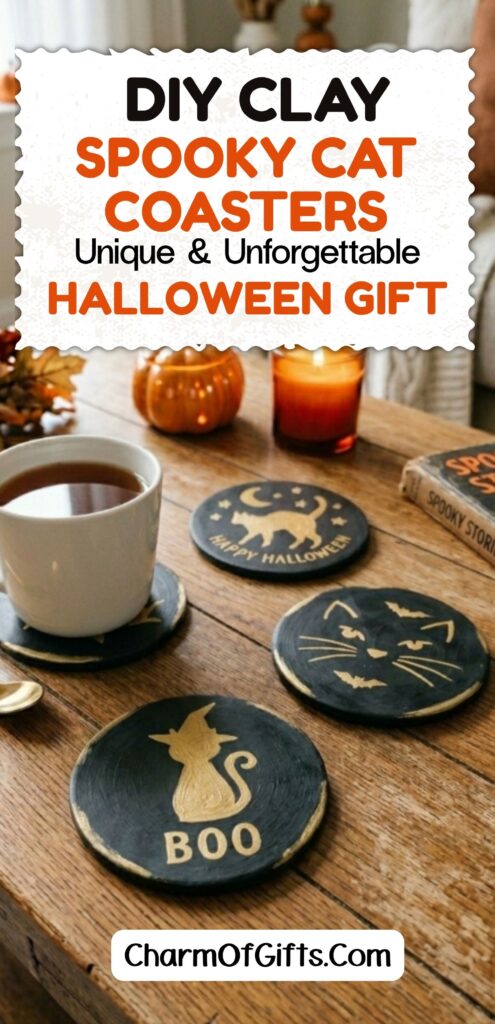
If you’re anything like me, you can’t think of Halloween without thinking of a black cat. I love having themed coasters in my living area that change with the season, especially something handmade.
Whether you’re making these for yourself, gifting them to your favorite cat lady, or looking for a fun weekend project, I’ve got you covered with everything you need to make your own set!
In this post, we’re going to cover the type of clay to use, how to paint a clean metallic gold design, and a few gift-wrapping ideas to turn your finished coasters into an actual Halloween gift.
Let’s get started!
P.S: This post contains affiliate links from Amazon and other retailers. If you make a purchase through these links, I will receive a small commission. Pls check Privacy Policy and T&C for more information.)
Why Give a Handmade Clay Gift?
A handmade gift carries a different weight than something bought off a shelf. It says you took the time to make it, not just pick it up on the way over.
These coasters are also budget-friendly, which makes them an easy option for teacher gifts, coworker exchanges, or anyone. Great idea, in this economy, if you want to gift a small group of people something useful and meaningful, without spending a lot per person.
They’re simple enough that kids can help too, so it can double as a fun weekend project as well as a gift-making session. If you do decide to do this activity with kids where coloring them is not an option then you can also use some cookie cutter stencils to lightly imprint Halloween themed shapes on the coasters.
What Makes These Coasters Special
Most Halloween clay coasters you’ll find online are the usual plain white ghosts or simple painted pumpkins. The black and gold color combination here is eye catching and unique. It feels a little more elevated, more coffee table decor than kids’ craft, even though it’s still simple enough for a beginner to make.
The cat silhouette paired with hand-painted lettering also means every coaster in your set can be a little different. No two need to look exactly alike, which is part of what makes a handmade gift feel special in the first place.
And because these are entirely handmade, they stand out. A recipient won’t find the same coasters in a store, so every time someone asks “where did you get these?”, they’ll think of you.
What You’ll Need
- Soft Air dry clay in black
- A rolling pin
- A round cookie cutter, or a paper stencil traced onto the clay, for same-sized coasters
- A butter knife or clay cutting tool
- Parchment paper
- A white or silver pencil, for sketching the design before painting
- Metallic gold acrylic paint and a fine detail brush
- Gloss clay varnish or sealant
A quick note on clay type: We’re using air dry clay for this project because it’s non-toxic and needs no special equipment. It’s also easy to work with for a beginner project.
Just keep in mind these coasters are decorative and meant for everyday use, like setting down a coffee mug or glass. They’re not for holding food directly or sitting under anything with real heat, like a candle or tea light.
Step 1: Roll Out the Clay
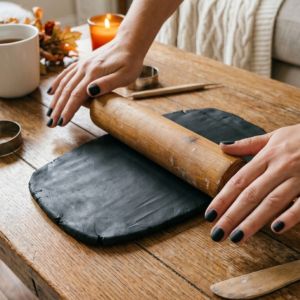
Roll the black clay into a flat slab, about ¼ inch thick, using your rolling pin.
Keep the thickness even across the whole slab so your coasters dry evenly.
Step 2: Cut the Coaster Shape
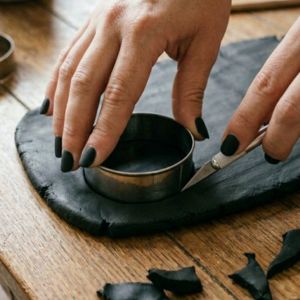
Press a round cookie cutter into the clay, or trace around a paper stencil with a knife, to cut out your coaster shape.
Don’t toss the leftover scraps. They can be balled up, re-rolled, and used to cut more coasters.
Step 3: Let Them Dry
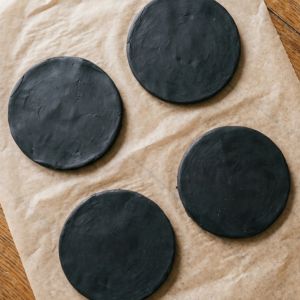
Lay your coasters flat on parchment paper, on a completely flat and level surface, so they don’t warp while drying.
Drying usually takes 24 to 48 hours depending on thickness. Flip them occasionally so both sides dry evenly.
Step 4: Sketch Your Design
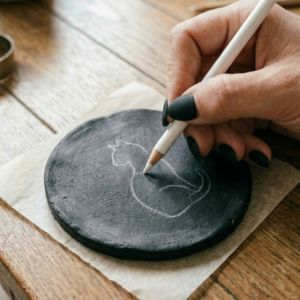
Once the coasters are completely dry, lightly sketch your cat silhouette onto the surface using a white or silver pencil.
This gives you a guide to follow when painting, so you don’t have to freehand the shape with a loaded brush.
Step 5: Paint the Cat Silhouette
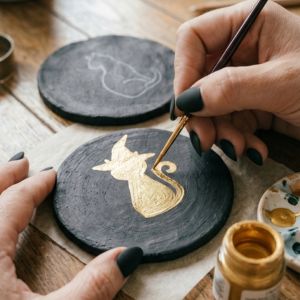
Using a fine detail brush, fill in your sketched cat outline with metallic gold acrylic paint.
If the paint feels thick, thin it with a small drop of water so it flows smoothly and covers evenly.
Step 6: Paint the Lettering
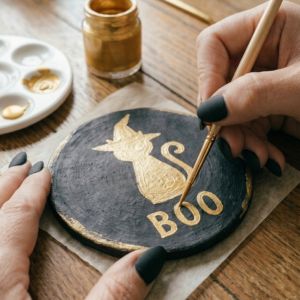
Once the cat silhouette is dry, paint your lettering underneath it, like “BOO” or “Happy Halloween,” using the same gold paint and a steady hand.
Let the paint dry fully before moving on to sealing.
Step 7: Seal for Durability
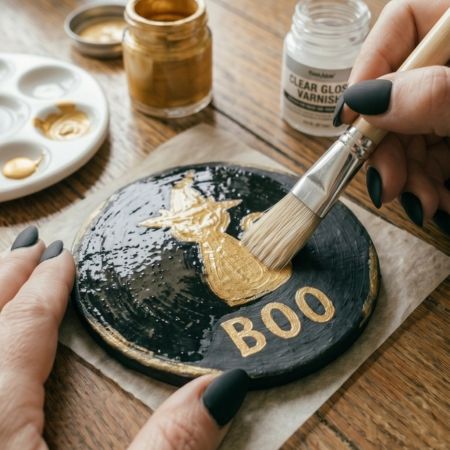
Brush on a coat of gloss varnish once the gold paint has fully dried. This protects the metallic finish and gives the coasters a polished shine.
As with any clay coaster, this step is about durability and shine, not making them food-safe or heat-safe. Keep them for everyday drinkware, not hot dishes or candles.
How to Turn These Cat Coasters Into the Perfect Gift
These coasters don’t need much dressing up to become a real gift, but a little styling goes a long way. Here are a few easy ways to give them:
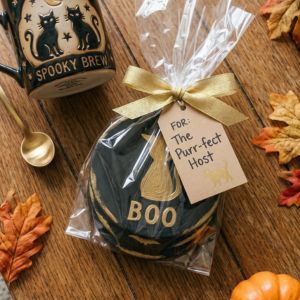
As they are. Stack a set of four, tie them with a ribbon, and add a small gift tag. Simple, and still feels thoughtful because it’s handmade.
As a hostess gift. Pair the coasters with a bottle of wine for anyone hosting a Halloween or fall gathering. The black and gold looks elegant enough to hand over at the door.
With a mug and treats. Fill a mug with some candy, or slip in a couple of instant coffee pouches, and set it next to the coasters. This is an easy one for coworkers or a small thank-you gift.
As a full gift basket. I put together a basket for some close friends using the coasters, a Halloween mug I found at a department store, some Halloween candy, and a couple of treats.
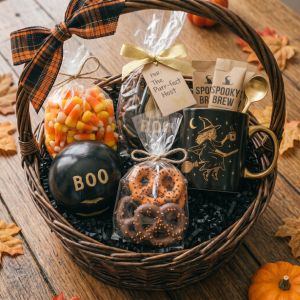
I didn’t make the mug myself, but I picked one in the same black and gold palette so it matched the coasters.
For one basket, I used a mug with a flying witch on it, and for another, a mug with two black cats under a crescent moon. Either style works, as long as the colors tie in with your coasters.
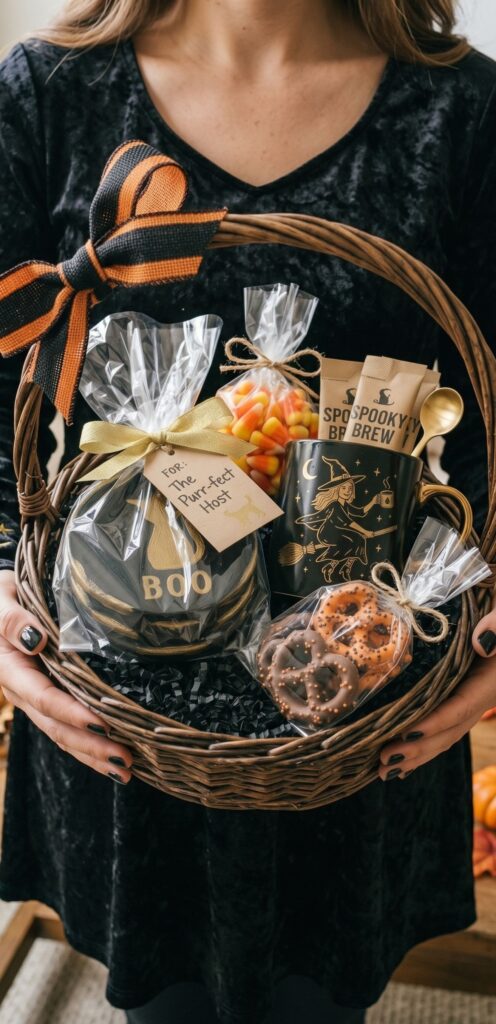
However you give them, these coasters tend to be memorable. They’re not something you can pick up at any store, so when someone compliments them, the recipient gets to say a friend made them, and they will think of you every time they use them.
***
Also Check Out:
Easy Beginner-Friendly Clay Halloween Gifts: Candy Corn Coasters to Make With Kids
Mummy Wrap Clay Halloween Gifts: Striped Coasters to Make With Bigger Kids
Spooky DIY Halloween Clay Ideas to Make And Gift